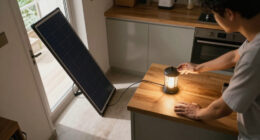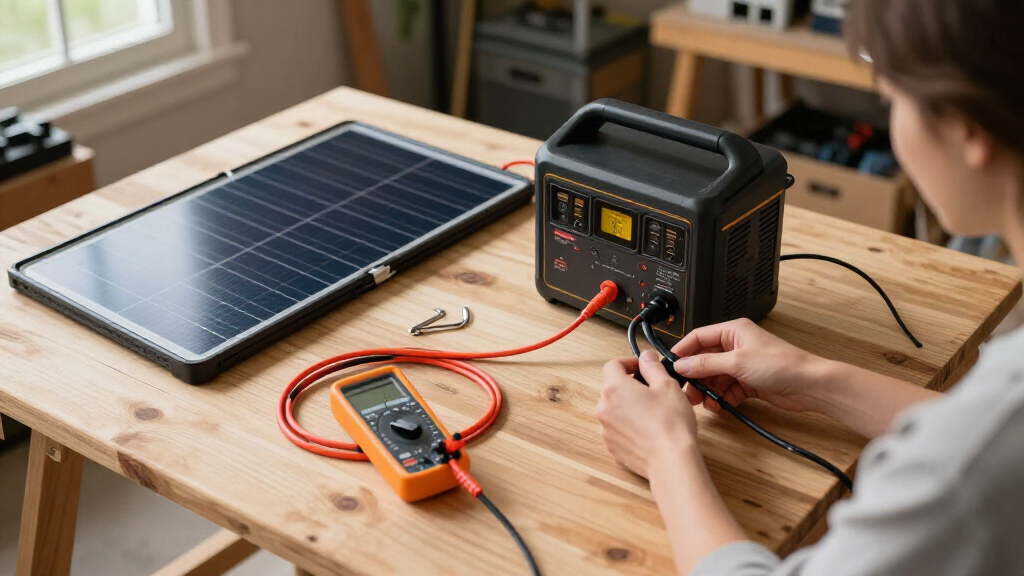
This guide walks you through buying the right solar backup power station for your needs, setting it up at home, connecting it to your essential devices, and keeping it ready for an outage. By the end, you will have a charged, tested backup system that can run your fridge, phones, lights, or medical devices when the grid goes down — without installing anything permanent or touching your home’s wiring.

Get backup power and energy gear delivered free — and shop member deals
- Fast, free delivery on millions of items
- Access to Prime Big Deal Days deals on October 6–7
- Prime Video, Amazon Music and more included

GRECELL Portable Power Station 500W, 519Wh Solar Generator with 2 AC Outlets and PD 60W USB-C
- ✔ Capacity: 519Wh / 140,400mAh
- ✔ AC Output: 2 x 110V pure sine wave, 500W
- ✔ Battery Type: Lithium

ZeroKor 300W Portable Power Station with 60W Foldable Solar Panel
- ✔ Output Power: 300W max
- ✔ AC Outlets: 2 x 300W max
- ✔ DC Port: 1 x 9V–12.6V / 10A max

Jackery Explorer 300 Portable Power Station, 292Wh Backup LiFePO4 Battery
- ✔ Capacity: 292Wh
- ✔ Output: 300W continuous, 600W surge
- ✔ Weight: 7.1 lbs
This guide is written for beginners. No electrical experience is required. If you can plug in a lamp and read a display panel, you can complete this task. Budget roughly 1-2 hours for setup and testing, plus several hours of charging time before the system is fully ready.
Difficulty: Beginner | Time: 1-2 hours for setup, plus 4-8 hours for the first full solar charge
What You’ll Need
Tools & Materials:
- A portable power station (battery capacity sized to your needs — see Step 1)
- One or more portable solar panels with a compatible charge cable
- A wall outlet for the initial indoor charge
- A notebook or phone notes app to record your setup details
- Optional: a plug-in power meter (about $20) to measure device draw accurately
Knowledge:
- Basic ability to read watts (W) and watt-hours (Wh) — explained below as needed
- Familiarity with plugging devices into standard household outlets
Two numbers matter when shopping. Battery capacity is measured in watt-hours (Wh): a 1,000 Wh station can run a 100 W device for roughly 10 hours. Inverter output is measured in watts (W): it limits how powerful a single device can be. A 1,000 W station cannot run a 1,500 W space heater, no matter how much battery it has left.
Check that your solar panels and power station use the same charging connector (common types include MC4, XT60, and Anderson). Buying both from the same brand avoids most compatibility problems.
GRECELL Portable Power Station 500W, 519Wh Solar Generator with 2 AC Outlets and PD 60W USB-C
The GRECELL takes our top spot because it solves the problem a backup station exists for: keeping essential devices running as long as possible during an outage. Its 519Wh capacity is nearly double the Jackery Explorer 300’s 292Wh, which translates directly into more phone charges, more laptop top-ups, or additional nights of CPAP use before you need to think about recharging. For outage-focused buyers, that headroom matters more than anything else.The other reason this model leads the lineup is its pure sine wave AC output. The Jackery and ZeroKor deliver modified sine wave power, which is fine for fans and phone chargers but less ideal for laptops, audio equipment, and especially medical devices. The GRECELL produces the same clean waveform as a wall outlet, so you can run a CPAP machine or a modern laptop charger without worrying about stress on the device’s power supply.Its port selection is the broadest here too: with three Quick Charge USB-A ports, a 60W USB-C port, two DC ports, a car socket, and even a 10W wireless charging pad, it can serve up to ten devices at once — the Jackery maxes out at six, the ZeroKor at fewer still. The tradeoffs are real, though. Solar charging is slow at 6–9 hours with a 100W panel even in full sun, the panel itself is not included, and its lithium cells require a recharge every three months to stay healthy. Compared with the Jackery’s 4,000-cycle LiFePO4 chemistry, the GRECELL’s battery will likely age faster with the same usage, which is the main reason it doesn’t win on longevity.
Pros:
- Largest capacity in this lineup at 519Wh, roughly double the Jackery Explorer 300
- Pure sine wave AC output is safe for sensitive electronics and CPAP machines
- Widest port selection, including QC3.0 USB-A, 60W USB-C PD, and a 10W wireless charger
- Accepts up to 200W of solar input, more than the other two stations
Cons:
- Solar panel sold separately, adding to the total cost of a solar setup
- Slow recharging at 6–9 hours even with a 100W panel in full sun
- Must be recharged at least every three months to maintain battery health
Best for: Households preparing for multi-hour blackouts who need to run laptops, lights, fans, or a CPAP machine and want the longest runtime per charge.
Not ideal for: Anyone who wants a complete solar kit in one purchase, or buyers prioritizing a battery that will last a decade of cycles — the missing panel and standard lithium chemistry work against both.
Bottom line: If maximum runtime and clean power for sensitive devices are the priorities, the GRECELL is the strongest blackout companion in this group despite its slow recharge times.
“If maximum runtime and clean power for sensitive devices are the priorities, the GRECELL is the strongest blackout companion in this group despite its slow recharge times.”
ZeroKor 300W Portable Power Station with 60W Foldable Solar Panel
Here’s the thing that separates the ZeroKor from the other two picks: you actually get a solar panel. The Jackery and GRECELL both treat panels as an extra purchase, which means the price you see isn’t the price of a functioning solar generator. ZeroKor bundles a 60W foldable monocrystalline panel with 20.5% conversion efficiency, plus every cable you need to connect them. For a first-time buyer who wants to understand solar backup without assembling a system piece by piece, this is the low-friction entry point.The bundled panel isn’t an afterthought, either. It offers multiple outputs of its own — USB-A, USB-C up to 15V/2A, and a DC output — so you can charge devices directly from the panel on sunny days while reserving the station’s battery for later. That’s a flexibility the other two options simply can’t match out of the box. The station itself includes a built-in MPPT charge controller, which squeezes more usable power out of the panel than a basic controller would.Where the value equation sours a bit is capacity and chemistry. ZeroKor doesn’t publish a watt-hour figure comparable to the others, and the station is capped at 300W of output, so coffee makers, hair dryers, and water pumps are off the table — same ceiling as the Jackery but without the Jackery’s premium battery chemistry. Two quirks deserve attention: the panel’s junction box is not waterproof, so you’ll want to keep it shaded from rain, and the station needs regular charge/discharge cycling to avoid slipping into a protection state. Compared with the GRECELL, you’re giving up roughly half the capacity and pure sine wave output in exchange for paying once and getting everything.
Pros:
- Only pick in this lineup that includes a solar panel — a true all-in-one kit
- 60W monocrystalline panel with 20.5% conversion efficiency and its own USB/DC outputs
- Built-in MPPT controller plus three recharge methods: solar, wall, and car
- Comprehensive BMS protection with an automatic cooling fan
Cons:
- 300W output ceiling rules out high-draw appliances
- Solar panel junction box is not waterproof
- Requires regular charging/discharging cycles to avoid entering a protection state
Best for: Budget-conscious beginners and casual campers who want a complete, ready-to-use solar generator kit without buying components separately.
Not ideal for: Anyone prepping for extended outages who needs serious capacity, or users in rainy climates who can’t guarantee dry conditions for the panel.
Bottom line: For buyers who value a complete, working solar setup over maximum capacity, the ZeroKor kit delivers more immediate capability per dollar than anything else here.
“For buyers who value a complete, working solar setup over maximum capacity, the ZeroKor kit delivers more immediate capability per dollar than anything else here.”
Jackery Explorer 300 Portable Power Station, 292Wh Backup LiFePO4 Battery
At 7.1 pounds with an integrated carry handle, the Jackery Explorer 300 is in a different category from its rivals when it comes to getting power where you need it. The GRECELL and ZeroKor are stations you set up at a campsite or stash in a closet; the Explorer 300 is one you genuinely carry — to a tent site, a hunting cabin, or a hotel room during an extended outage evacuation. That portability, combined with serious durability, defines this pick.The standout spec is the LiFePO4 battery chemistry rated for 4,000+ charge cycles — roughly 70% capacity retention after a decade of typical use. Both competing stations use conventional lithium cells that will age noticeably faster under the same treatment. For a device that mostly sits waiting for emergencies, chemistry matters more than raw specs: a station that still holds most of its capacity in year eight beats a bigger one that’s faded by year four. LiFePO4 is also inherently more thermally stable, which is worth knowing for anything stored in a car or garage.Its 292Wh capacity is the smallest in this group — about 56% of the GRECELL’s — so it’s the weakest choice for riding out a long blackout at home. And like the GRECELL, the solar panel is a separate purchase, unlike the ZeroKor kit. But when paired with a 100W panel, the Jackery hits 80% charge in roughly 2.8 hours, the fastest solar recharge in this lineup by a wide margin. Output is capped at 300W like the ZeroKor, though the 100W USB-C PD port outclasses anything the other two offer for laptop charging speeds.
Pros:
- Ultra-lightweight at 7.1 lbs with a built-in carry handle
- LiFePO4 chemistry rated for 4,000+ cycles — dramatically longer lifespan than standard lithium
- Fastest solar recharge in this lineup: 80% in about 2.8 hours with a 100W panel
- 100W USB-C PD port charges full-size laptops at full speed
Cons:
- Smallest capacity here at 292Wh
- Solar panel sold separately
- 300W output limit excludes high-power appliances
Best for: Campers, travelers, and outdoor users who need reliable power they can actually carry, and who value a battery that will outlast the competition by years.
Not ideal for: Home-outage preppers who need maximum runtime — the 292Wh capacity drains quickly when running multiple devices for hours.
Bottom line: The Explorer 300 trades capacity for portability and longevity, making it the smartest pick for people whose backup power needs to travel with them.
“The Explorer 300 trades capacity for portability and longevity, making it the smartest pick for people whose backup power needs to travel with them.”
As an Amazon Associate we earn from qualifying purchases.
Before You Start
Before you buy anything, decide what you actually need to power during an outage. Pick your top three essentials — for most households this is a refrigerator, phone chargers, and a few lights or a Wi-Fi router. A typical refrigerator draws 100-200 W while running and cycles on and off, using roughly 1,000-1,500 Wh per day. Phones and LED lights use very little. If you need to run a medical device such as a CPAP machine, note its wattage from its label and add 30% to your capacity target as a safety margin.
Safety note: portable power stations are safe to use indoors because they contain no engine and produce no fumes. Never bring a gasoline generator indoors — this guide does not cover gas equipment. Also place your station where air can circulate around it; do not enclose it in a cabinet or closet while it is charging or discharging.
Step-by-Step Instructions
Step 1: Calculate your daily energy needs
List the devices you want to run during an outage. Find each device’s wattage — printed on the appliance label, its power brick, or the manual — and write down how many hours per day it must run. Multiply watts by hours for each device, then add the totals together to get your daily energy need in watt-hours. Multiply by the number of outage days you want to cover, and add 20% for battery losses.
For example: a fridge (1,200 Wh/day) plus a router (50 Wh/day) plus phone charging (30 Wh/day) equals about 1,280 Wh per day. For two days of coverage with margin, look for a station of roughly 3,000 Wh, or accept recharging daily with solar panels.
Tip: Refrigerators and freezers use far less energy if you keep the door closed during an outage. Open them only when needed.
Check: You have a written number for daily watt-hours needed and a target station size that exceeds it by at least 20%.
Step 2: Buy a station and solar panels that match
Choose a power station whose inverter output exceeds your highest-wattage single device by at least 25%. If your fridge draws 200 W at startup, pick an inverter rated 600 W or higher; many fridges briefly draw 3-4 times their running wattage at compressor startup, so check for a listed “surge rating” as well. Then buy solar panels totaling at least one-third of your station’s capacity in watts — for a 1,000 Wh station, get a 200 W panel set as a practical minimum — and confirm the connector type matches or includes an adapter.
Panels rated 100 W typically produce 60-80 W in real conditions. More panel wattage means faster recharging during an outage.
Tip: Buy station and panels from the same brand, or confirm the seller states they are compatible. This single step prevents the most common setup failure.
Check: The station’s inverter rating is at least 25% above your biggest device’s draw, and the panel connector fits the station’s solar input port.
Step 3: Charge the station fully from a wall outlet
Unbox the station, place it on a hard, flat surface at room temperature, and read the quick-start card. Connect the included AC charging cable to the station and plug it into a wall outlet. Press the main power button if the display does not light up. Expect charging from empty to full to take 2-6 hours depending on model.
While it charges, locate and identify on the unit: the AC outlet button, the USB button, the display that shows battery percentage and input/output watts, and the solar input port. Find these now so you can operate everything by feel during an actual outage.
Tip: Do the first charge indoors from the wall. It is faster, and it confirms the unit works while you can still return it easily if defective.
Check: The display reads 100% and the input wattage drops to zero or near zero.
Step 4: Test your solar panels outdoors
Take the panels outside on a sunny day. Set them up so they face the sun directly, tilted rather than lying flat, and adjust the angle a couple of times over the day if convenient. Connect the panels to the station’s solar input port — connect at the station end first, then check the display shows incoming watts. Expect a 200 W panel set in good sun to show roughly 120-170 W coming in.
Avoid shade: even one shaded corner of a panel can cut output dramatically. Keep panels away from tree shadows, and wipe off dust and leaves.
Tip: If the display shows zero input, reverse the order of connections or check for a shade line across the panel face before assuming the equipment is broken.
Check: The station display shows solar input wattage above 60% of the panels’ rated wattage in clear midday sun.
Step 5: Run a real outage drill with your essential devices
Unplug your chosen essentials from the wall and plug them into the station’s AC outlets. Turn on the AC outlet button on the station. Let them run for at least two hours, checking the display periodically. Note the output wattage shown — this tells you your real combined draw — and calculate how long a full charge will last by dividing the station’s watt-hour capacity by that number.
Test your fridge specifically: let it cycle on and off for an hour to confirm the station handles the compressor’s startup surge without shutting down.
Check: All essential devices run normally, the station does not trip or alarm, and you have written down your expected runtime per full charge.
Step 6: Store the station and panels ready for use
Place the station in an indoor location between 10-30°C (50-86°F), away from direct sunlight, moisture, and heat sources. Coil the cables loosely and store them with the station so nothing goes missing. Set the battery to between 50-80% for storage — some models have a storage mode in their settings; otherwise charge to about 80% and unplug.
Plan to recharge the station to full every 1-2 months, or on the eve of a known storm warning. Batteries slowly self-discharge, and a station at 60% in month four may be much lower than you expect.
Tip: Put a recurring phone reminder labeled “recharge power station” for every 6-8 weeks. This is the habit that separates a working backup from a dead one.
Check: The station sits at 50-80% charge in a temperature-stable spot, with all cables and panels stored together in one place.
Step 7: Operate the system during an actual outage
Move the station near your essentials and plug in your highest-priority devices first. Run only what you need, and turn off the AC outlet button entirely when nothing is plugged in, since the inverter itself draws power. Position solar panels outside in the sun as early in the day as possible and reconnect them to keep the battery topped up.
Watch the display percentage. When it drops near 20%, switch to only the essentials of the essentials — phones and lights — and let solar rebuild the charge.
Check: Your essentials run through the outage, and the station’s percentage never hits zero.
Common Mistakes to Avoid
- Buying a station too small for the fridge’s startup surge — Check the inverter’s continuous and surge watt ratings before buying. Pick a surge rating at least 3 times the fridge’s running watts.
- Leaving solar panels flat on the ground in partial shade — Tilt panels to face the sun directly and check every hour or two. Repositioning panels can double daily charging compared to leaving them flat.
- Storing the station at 0% or 100% for months — Store at 50-80% and top up every 1-2 months. Set a phone reminder the day you finish setup.
- Assuming compatibility between off-brand panels and stations — Buy the same brand, or verify the connector type and voltage range against the station’s solar input specification before purchase.
Troubleshooting
Problem: Station shows zero solar input on a sunny day
Solution: Check for shade across any part of the panel, verify the connector is fully seated, and confirm the total panel voltage is within the station’s rated input range (printed near the port). Some stations also require you to enable solar input in settings.
Problem: Station shuts off when the fridge compressor starts
Solution: This is a surge overload. Unplug other devices so the fridge starts alone, and if it still trips, move the fridge to a wall outlet and reserve the station for smaller loads — or upgrade to a station with a higher surge rating.
Problem: Solar input wattage is far below the panels’ rating
Solution: This is usually normal outside peak hours. Output of 60-75% of rated watts at midday is typical. Clean the panel face, improve the tilt angle toward the sun, and expect less output in winter, at high latitudes, or through windows (glass blocks much of the usable light — never charge through a window).
Problem: Station battery drains faster than expected during an outage
Solution: Check the display’s output wattage and unplug anything not actively needed. The AC inverter itself uses 10-30 W; switch phones and lights to the station’s USB ports, which are far more efficient than the AC outlets.
What Success Looks Like
Your setup is complete and working when all of the following are true: the station charges to 100% from the wall; solar panels deliver visible input wattage outdoors; your fridge and other essentials run through a two-hour test without the station tripping or alarming; you know your written runtime estimate per full charge; and the unit is stored at 50-80% charge with cables and panels together in one accessible place, with a recurring reminder set to recharge it every 1-2 months.
Next Steps
After setup, expand your readiness over time. Add a second panel set to cut outage recharge time in half. Label your station’s outlets with which device goes where so anyone in the household can deploy it, not just you. If you find you regularly need whole-house coverage or want to run a well pump or electric heating, that is the point to research larger fixed battery systems or a transfer-switch installation with a licensed electrician — a different project from this one. Repeat a short outage drill every six months to confirm the battery, inverter, and panels still perform to the numbers you recorded.
Frequently Asked Questions
How long will a power station run my refrigerator?
Divide the station’s watt-hours by your fridge’s running watts, then subtract about 25% for compressor cycling and inverter losses. A typical fridge using 1,200 Wh per day will run roughly 24 hours on a 1,500 Wh station, longer if you keep the door closed.
Can I charge the station with solar while devices are plugged in?
Yes. Most stations pass-through charge, meaning panels recharge the battery while outlets power your devices. If input watts exceed output watts, the battery still gains charge. Check your manual, as a few models restrict pass-through.
Are power stations safe to use indoors during an outage?
Yes. They contain lithium batteries and no engine, so they produce no carbon monoxide or fumes. Keep them on a hard surface with airflow around them, away from water and heat sources.
Do solar panels work on cloudy days or through a window?
Cloudy days typically yield 10-25% of rated output — slow but not zero. Windows block most usable light, so place panels outside whenever possible, running the cable through a door or window gap.
How often do I need to replace the battery?
Quality lithium stations (LiFePO4 chemistry) are rated for 2,000-3,000 charge cycles, which is roughly 5-10 years of typical backup use. Capacity declines gradually; recheck your runtime during your semi-annual drill.
Fall Picks
fall essentials
As an affiliate, we earn on qualifying purchases.