
TL;DR
Moving your rig into another room is the most effective way to cut noise. If you must use a closet, focus on sealing gaps, proper ventilation, and strategic placement of acoustic treatment for real results.
Ever tried to record or run a high-power rig in a tiny closet? It’s noisy, cramped, and often frustrating. But here’s a shocker: the most effective way to tame noise isn’t with foam or panels. It’s about shifting your mindset—and your gear—to a smarter spot.
In this guide, you’ll learn how to cut noise at the source, how placement tricks can make a huge difference, and what it really takes to turn a closet into a functional, quiet workspace. Whether you want a perfect recording booth or just a less annoying inference rig, these tips will save you time, money, and headaches.
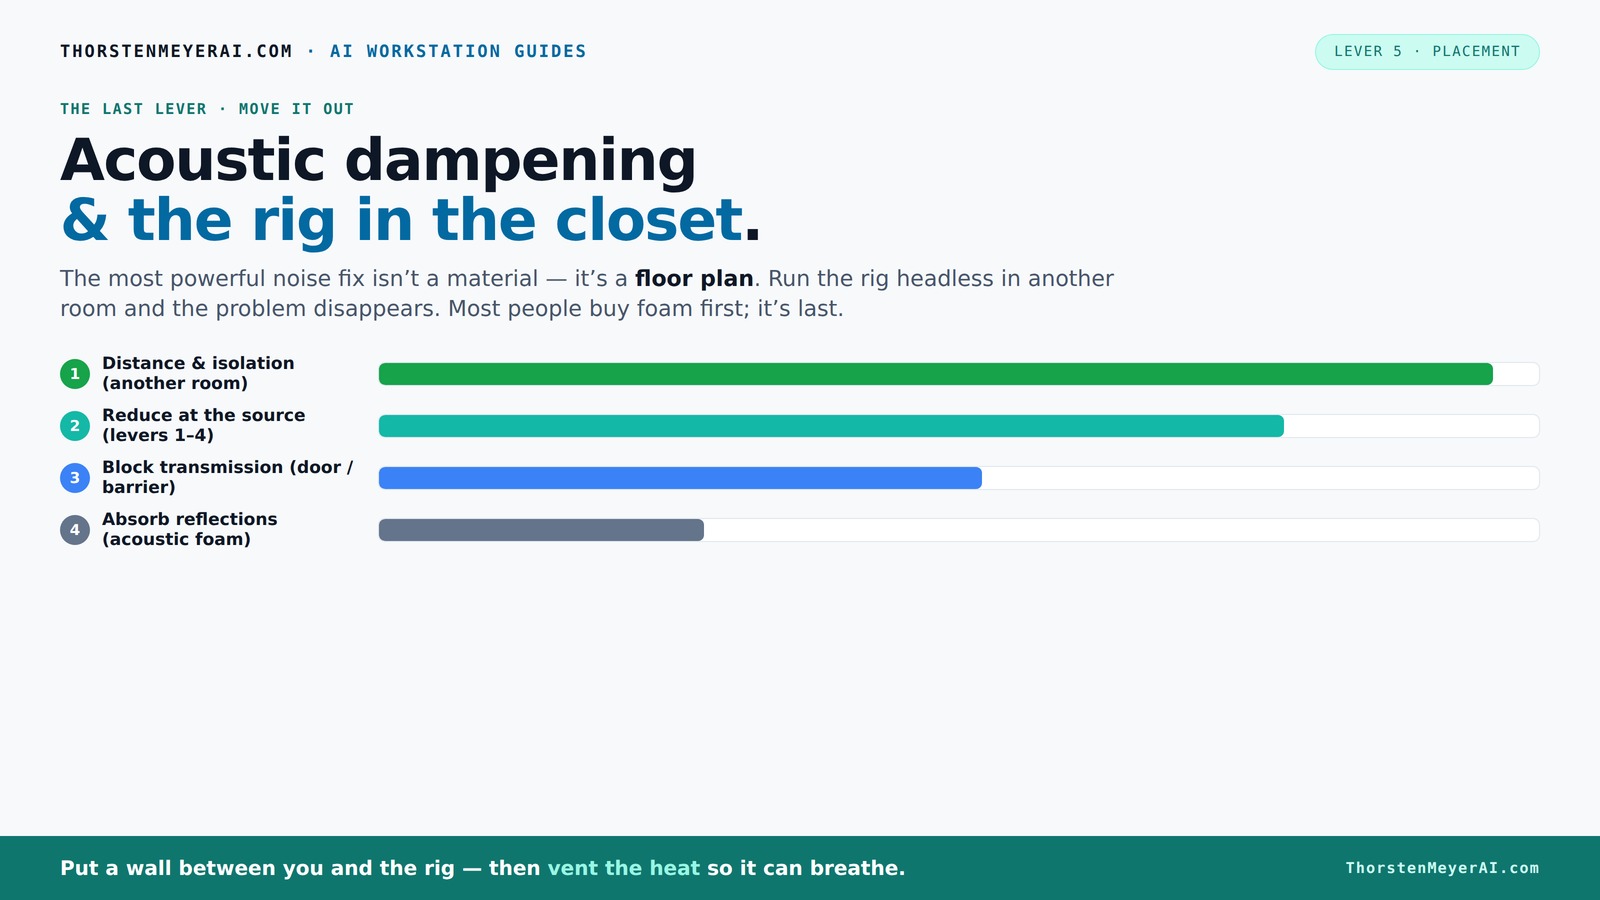
Acoustic dampening
& the rig in the closet.
The most powerful noise fix isn’t a material — it’s a floor plan. A rig you can’t hear because it’s in another room beats any amount of foam. Tap the approaches in Part 1 to see what actually works.
(another room)
(levers 1–4)
(door / barrier)
(acoustic foam)
Contain the noise, not the heat
Key Takeaways
- Moving your rig to another room is the most effective noise reduction strategy.
- Sealing gaps around doors and outlets is cheap and can cut noise leakage by half or more.
- Proper ventilation is essential when placing a rig in a closet—heat traps destroy silence.
- Targeted placement of acoustic panels at reflection points dramatically improves sound quality.
- Bass traps are worth it in small rooms with parallel walls to tame low-end muddiness.

Focusound 52 Pack Acoustic Foam Panels 1" x 12" x 12" Sound Proof Foam Panles Soundproofing Noise Cancelling Wedge Panels for Home Office Recoding Studio with 300PCS Double-Side Adhesive
- Soundproofing Design: Triangular grooves for noise absorption
- Includes Adhesive Tape: 300pcs double-sided adhesive for easy installation
- Easy Shape Recovery: Soak in water to restore foam shape
As an affiliate, we earn on qualifying purchases.
As an affiliate, we earn on qualifying purchases.
Why Moving Your Rig Is the Best Noise Solution
The simplest way to silence your rig? Put it somewhere else. A wall or another room is a literal sound barrier. When your inference machine is in a closet or basement, the direct line of noise transmission is cut off, significantly reducing the amount of sound reaching your workspace. This is especially critical because most noise issues stem from airborne sound and vibrations traveling through structures, which are much harder to control once they’re in your immediate vicinity.
Imagine your laptop on your desk, connected to a powerful GPU in a closet. The noise? It’s gone. You don’t need to invest in expensive soundproofing materials—just relocate the source. This setup isn’t just about quiet; it’s about reducing the complexity of soundproofing itself. When your rig is in a different room, the primary challenge becomes managing the connection and ventilation, rather than battling sound leaks and reflections. This approach often outperforms costly acoustic treatments because it addresses the problem at its root—distance and separation—rather than trying to contain the sound post hoc. This tradeoff is especially advantageous in small or budget-constrained environments, where sealing gaps and adding barriers may be impractical or ineffective.
In essence, relocating your rig can provide a more reliable, straightforward solution with minimal setup, letting you focus on your work without the constant noise distraction.
The 'Rig in the Closet' — How to Do It Right Without Burning Out
Placing a hot, power-intensive machine inside a closet might seem ideal for noise reduction, but it introduces serious risks and tradeoffs. Heat buildup is the primary concern because electronic components generate significant heat during operation, and a sealed space traps that heat, leading to temperature spikes. Over time, sustained high temperatures can shorten the lifespan of your equipment, cause thermal throttling, and even result in hardware failures. Fans and cooling systems are necessary, but they must be carefully implemented to avoid noise pollution from cooling fans themselves. Using quiet exhaust fans, passive vents, or ducting can help maintain airflow without introducing additional noise. An effective strategy is to use a dedicated soundproof cabinet with built-in cooling—these units are designed to dissipate heat while minimizing sound leakage, but they come with added cost and complexity.
Understanding airflow is critical: without sufficient ventilation, your rig will overheat, leading to performance issues and potential damage. Proper airflow management involves balancing intake and exhaust, ensuring cool air circulates and hot air escapes efficiently. This means considering not just the placement of fans or vents but also the overall design of your setup, including the use of ducting or external exhaust systems. The goal is to keep the equipment cool enough for reliable operation while maintaining a low noise profile—an important tradeoff that requires planning and investment.
For detailed cooling options and best practices, refer to this guide. Remember, neglecting proper ventilation can negate all your soundproofing efforts and damage your gear, so it’s worth prioritizing airflow alongside noise reduction.
Acoustic Treatment vs. Soundproofing: What Actually Works in a Tiny Closet
Acoustic treatment and soundproofing serve different but complementary purposes. Acoustic treatment—foam panels, bass traps, blankets—primarily addresses the internal acoustics of the space. It reduces reflections, echoes, and standing waves, which can muddy recordings and make monitoring difficult. Soundproofing, on the other hand, aims to prevent sound from escaping or entering the space, which involves sealing gaps, adding mass, and using barriers to block noise transmission.
In a tiny closet, treating reflections is vital because small spaces tend to amplify and color sound reflections, leading to a muddled or unnatural sound. Strategic placement of absorption panels at reflection points—such as the wall behind the mic and the ceiling—can dramatically improve clarity. Bass traps in corners help control low-frequency resonances that cause muddiness and boominess, especially in tight spaces where low-end buildup is common.
Soundproofing in a small closet involves sealing all possible noise leaks—gaps around doors, outlets, and joints—and adding mass to the structure. Foam panels alone are insufficient because they don’t block sound transmission through gaps or structural vibrations. Instead, use a layered approach: seal all cracks with weatherstripping or acoustic sealant, then add absorption materials, and consider adding mass (like drywall or soundproof blankets) if necessary. Each layer enhances the overall noise reduction, but understanding the specific purpose of each helps avoid wasted effort and expense. For more insights, visit Wired Guide. Combining these methods thoughtfully results in a space that’s both acoustically friendly and effectively insulated from external noise sources.
Frequently Asked Questions
Can a closet actually become a good recording booth?
Yes, with proper sealing, absorption, and ventilation, a closet can function as a decent vocal booth. It reduces reflections and low-end buildup, making recordings clearer. However, it’s not perfect for loud, full-band recordings—more suited for voice and low-volume tasks.What’s the difference between acoustic treatment and soundproofing?
Acoustic treatment absorbs and diffuses sound within a space, reducing echo and reverb—think foam panels and bass traps. Soundproofing blocks sound from escaping or entering, using barriers, mass, and sealing gaps. Both are important but serve different purposes.Where should I place my microphone in a closet booth?
Place your mic away from hard surfaces and reflection points—ideally, at the center of the room and slightly off the wall. Treat the wall behind the mic and the ceiling first. Use reflection points to position absorption panels for best results.Do I need bass traps in a small closet?
If your closet has parallel walls and you notice muddiness or boxiness, bass traps in the upper corners will help. They absorb low-frequency buildup, making your recordings clearer, especially for voice or music with bass content.Will foam panels soundproof a closet?
No, foam panels mainly absorb reflections. They do little to block sound leaks through doors or gaps. For real soundproofing, seal gaps, add mass, and consider barriers. Foam alone won’t turn your closet into a soundproof vault.Conclusion
The biggest gains come from changing where your rig sits and sealing leaks, not just slapping foam on the walls. Think of your space as a puzzle—seal gaps, add targeted treatment, and ventilate properly. That’s how you turn even a tiny closet into a quiet, professional-sounding space.
Remember, noise doesn’t have to be an unavoidable fact of life. With smart placement and a few simple tweaks, your workspace can stay silent while your rig roars in the background. Time to put these tips into action and reclaim your quiet.