Did you know that over 1.2 billion batteries are thrown away each year in the United States alone? Many people are unaware that certain battery types can be rejuvenated through welding techniques, leading to both significant cost savings and a reduction in waste. In this guide, you’ll discover how to revive a battery with a welder, explore the fundamentals of battery function, and learn essential safety measures for battery revival with welder techniques. Not only can successful welder battery restoration extend the life of your batteries, but it can also be an engaging DIY project that contributes to environmental sustainability.
Key Takeaways
- Reviving batteries can help prolong their lifespan and reduce waste.
- Understanding your battery type is crucial for successful revival.
- Safety precautions are essential when working with welding equipment.
- Specific tools and welders suit different battery revival techniques.
- Regular maintenance can prevent future battery problems.
- Learn the detailed steps involved in the welding process for battery restoration.
Understanding Battery Basics
Before you dive into the process of reviving batteries, it’s crucial to grasp the fundamentals of battery technology. Different types of batteries, such as lead-acid and nickel-cadmium (NiCad), each have unique characteristics and behaviors, especially when depleted. Understanding how these batteries function will aid you in the process of welder battery reconditioning and help you successfully revive old batteries with a welder.
Types of Batteries You Might Revive
Here’s a brief overview of common battery types you may consider reviving:
- Lead-Acid Batteries: Traditionally used in vehicles, these batteries are known for their reliability, but they can suffer from sulfation as they discharge.
- Nickel-Cadmium (NiCad) Batteries: These batteries were common in the 1970s and 1980s and are known for memory issues related to cyclic memory, which can affect energy delivery on repeated discharges1.
- Nickel-Metal Hydride (NiMH) Batteries: Introduced in the 1990s, NiMH batteries are less susceptible to memory issues but still require maintenance through periodic full discharges.
Signs Your Battery Needs Reviving
Identifying the need for reviving your battery can make all the difference. Look out for these signs:
- Performance Drops: If your battery demonstrates a notable decline in performance, it may need intervention.
- Inability to Hold a Charge: Struggling to retain a charge is a clear indication that reviving might help.
- Physical Anomalies: Look for swelling or leakage, as these can signify deeper issues within the battery.
Understanding these signs not only allows you to assess your battery effectively but also sets you on the path to successfully reviving it. Utilizing the method of welder battery reconditioning can breathe new life into batteries that show these warning signs.


Portable Solar Generator, 300W Portable Power Station with Foldable 60W Solar Panel,110V Pure Sine Wave 280Wh Battery Power Pack with USB DC AC Outlet for Camping Smart Devices RV Van Outdoor-Orange
- Powerful 300W Portable Generator: Charges smartphones, tablets, laptops, and small devices
- Includes 60W Foldable Solar Panel: Recharges via solar, AC, or carport
- Multiple Charging Outlets: 2 AC outlets, USB ports, DC port, quick charge USB
As an affiliate, we earn on qualifying purchases.
Safety Precautions Before Beginning
When you’re embarking on the task of using a welder to revive a dead battery, prioritizing safety becomes essential. The process can involve various risks such as electrical shock or exposure to hazardous materials. To ensure a secure and effective work environment, following essential safety guidelines is critical.
Essential Safety Gear to Wear
Before starting, make sure you’re equipped with the right safety gear. Here are the key items you’ll need:
- Insulated gloves: Protect your hands from heat and potential electrical hazards.
- Safety goggles: Shield your eyes from sparks and acid splashes.
- Face shield: Additional protection against flying debris during welding.
- Respirator mask: Guard against toxic fumes that can be released during the process.
Utilizing this personal protective equipment is crucial to ensure your safety while conducting welder battery repair.
Common Hazards to Look Out For
While working with batteries, you should be aware of several hazards that could arise:
- Risk of explosion: Lithium-ion and lead-acid batteries can explode if not handled carefully.
- Toxic fumes: Certain batteries can emit harmful gases when damaged or during welding.
- Electrical shock: Working with live wires poses a significant risk of shock.
- Acid exposure: Battery acid can cause severe skin burns and damage to surfaces.
Training and understanding these risks are vital for not only your safety but also for a successful reviving process. A comprehensive safety plan ensures you’re prepared to handle any situation that might arise while using a welder to revive a dead battery. Remember, a safe work environment is a crucial aspect of any DIY battery revival project2.

Tools and Materials You’ll Need
When working to rejuvenate battery with welding machine, having the right tools and materials at your disposal can make the difference between success and failure. A variety of essential items will help you ensure your project runs smoothly and effectively.
Recommended Welders for Battery Reviving
Choosing the appropriate welder is crucial for effectively restoring battery life with welding machine. Here are a few recommended types:
- DC Welders: These are particularly effective for lead-acid batteries, as they provide smoother arcs and control.
- MIG Welders: Suitable for metal types in battery terminals, allowing for good connections when charging.
- Stick Welders: An alternative for those comfortable with traditional methods, though they might require more skill.
Additional Supplies to Have on Hand
In addition to your welder, consider gathering these supplies to enhance your battery revival process:
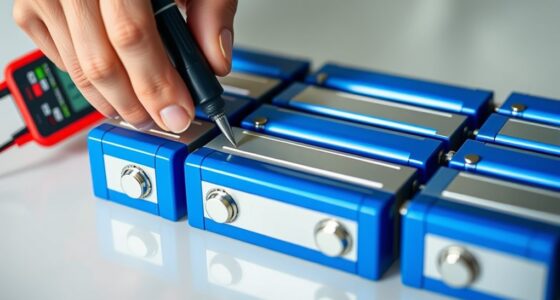
- Multimeter: Essential for checking battery voltage and ensuring you’re working with a viable battery.
- Insulated Clamps: Use these to secure connections safely and minimize risks while performing the welding process.
- Safety Goggles and Gloves: Always prioritize safety when working with batteries and welders.

By assembling the right tools and supplies, you’ll be better equipped to revitalize your battery efficiently and safely. As with any hands-on task, preparation is key to achieving the desired results.
Many individuals have reported success with the use of welders to restore batteries, emphasizing the importance of selecting the right equipment for your specific situation3. Being ready with the proper materials enhances your chances of successfully reviving the battery, allowing you to tackle the project confidently4.
Steps to Prepare the Battery for Reviving
Before diving into the world of welder battery restoration, it’s vital to ensure your battery is primed for revival. Preparation entails assessing the current condition and cleaning the terminals meticulously. A well-prepared battery not only boosts the chances of a successful revival but enhances its performance afterward.
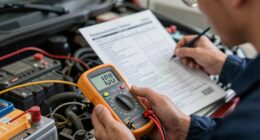
Assessing Battery Condition
Start by checking the battery voltage. A reading lower than 11.8 volts indicates that the battery may need reviving5. Fully charged batteries show a voltage of around 12.73 volts, while lower percentages yield lower voltages. It’s important to note that dead batteries could draw between 100-200mA when plugged into a charger. For a successful revival, seek a post-charging reading of 500-1000mA, which suggests the battery is responding positively to the rejuvenation attempts5.
Cleaning Battery Terminals
Cleaning the battery terminals is a crucial step in the preparation process. Dust, corrosion, and grime can significantly hinder the conductivity and efficiency of your connections. Use a mixture of baking soda and water to neutralize acid buildup, followed by a thorough rinse and drying. This straightforward cleaning can lead to a noticeable improvement in performance after you have learned how to revive a battery with a welder. Remember, the success rate for reviving batteries with serious sulfation issues stands at a striking 80%. Therefore, ensuring clean connections is pivotal6.

How to Perform the Welding Technique
Executing the welder battery repair process requires careful setup and precise steps to ensure effective battery revival while maintaining safety. Knowing how to set up your welder properly is essential for maximizing results during the restoration. Follow this guide for the steps to revive a battery using a welder safely and efficiently.
Setting Up Your Welder
Start by ensuring your welder is positioned on a stable surface, away from any flammable materials. Gather the necessary tools including:
- Welder with appropriate settings
- Heavy-duty extension cord capable of handling 10 amps
- Clamps for secure connections
- Spark plug socket or extension
- Two sets of jumper cables
Using a welder as an alternative to a high-quality charger can be a cost-effective choice, often making it more accessible for reviving batteries7. Make sure to acquire welding rods (6010 or 6011 1/8 inch electrodes) for about $20 maximum8. You may also find a welding electrode holder for as low as $5 on platforms like Amazon8.
Step-by-Step Welding Process
To perform the welding technique, follow these simple steps:
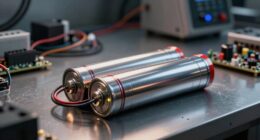
- Identify positive and negative terminals on the battery to prevent damaging components.
- Use two car batteries totaling 30-36 volts for enhanced power or utilize smaller batteries such as those from ATVs, golf carts, or motorcycles8.
- Connect the jumper cables to the terminals of the dead battery.
- Create a short circuit by welding the jumper cables to the battery terminals for about ten minutes to encourage rejuvenation7.
- Monitor the welding process closely and make sure to apply tacks at the beginning and end, and every six inches in between for proper support8.
- In case an electrode gets stuck, safely break the circuit by releasing the electrode from the clamp to prevent accidents8.
- After welding, connect the revived battery to another vehicle’s battery to test its capability before full use7.
By following these steps carefully, you can improve the chances of successful welder battery repair while minimizing risks involved in the process.

Testing the Revived Battery
Once you’ve successfully performed the battery revival with welder techniques, it’s crucial to assess the battery’s performance. This evaluation will ensure the battery is functioning properly and ready for reconnection.
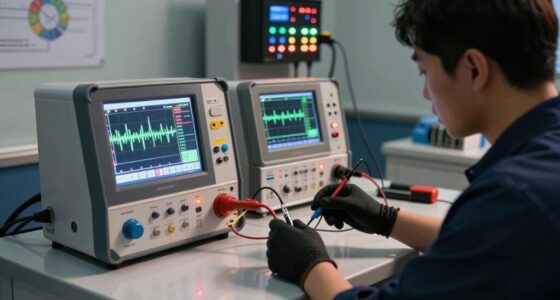
Conducting a Voltage Test
To conduct a voltage test, you will need a multimeter. Start by setting the multimeter to the DC voltage setting and connect the probes to the battery terminals. Measure the voltage output, which should ideally be in the range of 10 to 13.5 volts after revival9. If the voltage falls below this range, further charging may be necessary. Regular load testing is recommended to evaluate the battery’s functionality, as it can help identify any lingering issues post-rejuvenation6. Keep in mind that not all dead batteries can be successfully revived, particularly those with internal breaks.
Tips for Properly Reconnecting
Once you’re satisfied with the voltage results, it’s time to reconnect the battery. Ensure that you follow these tips for a safe and effective reconnection:
- Always clean the battery terminals before reconnection to ensure optimal contact.
- Use gloves and goggles for protection while handling the battery, as lead sulfide and other corrosive elements may pose risks6.
- Connect the positive terminal first, followed by the negative terminal to prevent sparks.
- Monitor closely for any signs of leakage or swelling, which may indicate a failed revival attempt.
- Consider conducting a final voltage test after reconnection to ensure everything is functioning smoothly.

Following these steps ensures not only the revival of your battery but also its safety and performance once reconnected9.
Maintenance Tips to Extend Battery Life
Proper maintenance is key to ensuring that your revived battery continues to perform at its best. After you successfully revive old battery with welder techniques, regularly inspecting and caring for your battery can significantly extend its lifespan. By adopting a few straightforward practices, you can enjoy reliable performance and prevent future issues.
Regular Maintenance Practices
Start by keeping battery terminals clean to avoid corrosion, which can weaken the connection. Ensure that connections are tight, and check the battery’s charge levels regularly. Using products like dielectric grease on terminals can help minimize corrosion, fostering better conductivity over time. It’s also wise to periodically inspect your battery’s performance and take note of any unusual behaviors, such as a drop in charge that might indicate potential issues down the line.
How to Avoid Future Battery Issues
Understanding when to seek professional help is crucial. If you notice your battery frequently requires reviving or shows signs of rapid discharge, it may be time to consult a specialist. Moreover, investing in quality tools like those from Harbor Freight can enhance your DIY maintenance efforts. For instance, their jumper cables are readily available for $12, providing a reliable solution for jump-starting your battery when necessary10. By practicing good maintenance habits, you’ll greatly reduce the likelihood of future battery failures and maximize the effectiveness of your welder battery reconditioning efforts.
FAQ
Can all types of batteries be revived using a welder?
What safety precautions should I take when reviving a battery with a welder?
What type of welder is best for battery revival?
How can I tell if my battery is a good candidate for revival?
What steps should I take to prepare the battery before using the welder?
How do I execute the welding process effectively?
After reviving the battery, how do I test its functionality?
What maintenance practices should I follow to extend my battery’s life post-revival?
Source Links
- https://batteryuniversity.com/article/bu-807-how-to-restore-nickel-based-batteries – BU-807: How to Restore Nickel-based Batteries
- https://www.millerwelds.com/-/media/miller-electric/files/pdf/safety/english/enpak-en.pdf – EnPak
- https://www.tractorbynet.com/forums/threads/just-fixed-a-battery-with-a-welder.135092/ – Just Fixed a Battery with a Welder!
- https://www.ramforum.com/threads/reconditioning-a-battery-with-a-dc-arc-welder.186643/ – Reconditioning a battery with a DC arc welder…
- https://www.instructables.com/How-to-revive-old-lead-acid-batteries/ – How to Revive Old Lead Acid Batteries
- https://www.toolify.ai/ai-news/revive-dead-batteries-with-stick-welder-211719 – Revive Dead Batteries with Stick Welder
- https://www.large.net/news/9au43nd.html – How to Rejuvenate Car Battery – Welder and Espsom Salt-battery-knowledge
- https://makezine.com/projects/car-battery-welding/ – Car-Battery Welding
- https://weldingweb.com/vbb/threads/266681-restored-an-old-battery-for-10?p=2507461 – restored an old battery for $10
- https://www.instructables.com/Golfcart–Welder/ – Batteries + Jumpercables = DC Welder