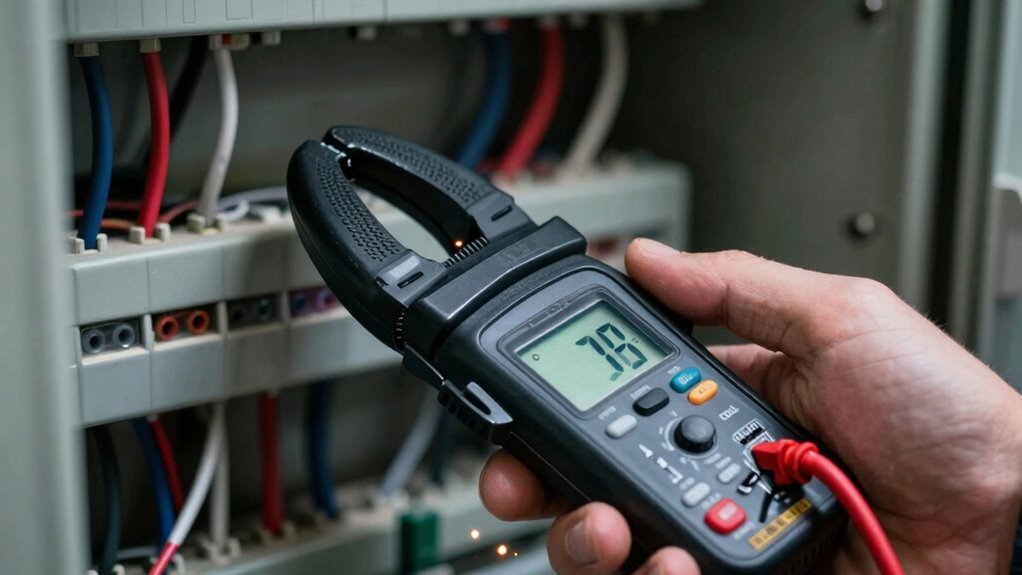

To measure parasitic draw without disconnecting anything, set your DC clamp meter to the correct low-current range and make sure it’s properly closed around the wire feeding the circuit. Clamp around the cable to get an immediate reading of any unintended current flow, even when the system is off. This method is safe and quick, helping you pinpoint issues without disassembly. Keep in mind proper techniques for reliable results—continue to uncover more useful tips.
Key Takeaways
- Ensure the clamp meter is set to the correct DC current range and properly closed around the wire for accurate measurements.
- Clamp around the power supply cable or wiring branch feeding the circuit to detect parasitic draw without disconnecting components.
- Use the clamp meter to measure current on individual wires or branches to pinpoint the source of parasitic drain.
- Turn off the system before adjusting or repositioning the clamp to prevent inaccurate readings or safety hazards.
- Confirm proper clamp closure and avoid mid-measurement range switching to maintain consistent, reliable results.

When it comes to measuring DC currents accurately, knowing some effective clamp meter tricks can make all the difference. One of the most useful techniques involves evaluating parasitic draws without disconnecting anything, which is essential for maintaining circuit protection and ensuring safety. Instead of pulling apart wiring or disconnecting components, you can simply clamp around a wire to get an instant reading. This approach saves time and reduces the risk of introducing errors or damaging sensitive electronics. To start, make sure your clamp meter is set to the correct DC current range, and always verify that it’s functioning properly before testing. This ensures precise readings, especially when dealing with low-level parasitic currents that can be difficult to detect.
When troubleshooting, it’s important to identify unintended loads that drain power from your battery or power source. Using your clamp meter, you can quickly check for parasitic draw by clamping around the cable that feeds the circuit. If the meter registers a current, you know something is pulling power even when the system is supposed to be off. This trick is invaluable for diagnosing issues like faulty relays, stuck switches, or leaking diodes that can compromise circuit protection. By pinpointing the source of the parasitic current, you can take targeted action to repair or replace faulty components, avoiding unnecessary disassembly.
Another key trick involves isolating sections of a circuit to narrow down the root cause of a parasitic drain. With your clamp meter, you can clamp around individual wires or branches in the circuit to see where the current is flowing. This helps you develop troubleshooting techniques that are less invasive and more efficient, especially in complex wiring setups. It’s also a safe way to check circuits without risking shorts or accidental shocks. Remember, always turn off the power supply before making adjustments or moving your clamp to prevent any mishaps. Once you identify the offending component or circuit segment, you can implement circuit protection measures like fuses, relays, or circuit breakers to prevent future issues.
Frequently Asked Questions
Can a DC Clamp Meter Measure AC Parasitic Draws?
A DC clamp meter isn’t designed to measure AC parasitic draws directly, as it primarily measures DC current. For AC parasitic draws, you’d need a clamp meter calibrated for AC current measurement. During battery drain testing, verify your clamp meter is properly calibrated to get accurate readings. While it excels at measuring DC parasitic loads, for AC, double-check your meter’s specifications and calibration to avoid inaccurate results.
What’s the Maximum Current a Typical Clamp Meter Can Handle?
A typical clamp meter can handle a current range of up to 600 amps, though some professional models reach 1000 amps or more. Your jaw size influences this, as larger jaws can accommodate bigger conductors and measure higher currents comfortably. Always check your meter’s specifications to verify it suits your needs, especially if you’re working with high-current applications, to avoid overloading and ensure accurate readings.
Is It Safe to Measure Parasitic Draw on Sensitive Electronics?
Think of measuring parasitic draw as walking a tightrope over fragile electronics. It’s generally safe if you follow proper safety precautions, but you must be cautious because sensitive electronics can be easily disturbed. Use a clamp meter with appropriate range, avoid short circuits, and keep steady hands. If unsure, consult the device’s manual or a professional. Always prioritize safety to prevent damage or inaccurate readings.
How Do Temperature Variations Affect Clamp Meter Readings?
Temperature fluctuations can impact your clamp meter readings by affecting its calibration accuracy. As temperatures rise or fall, internal components may expand or contract, leading to slight measurement inaccuracies. To guarantee precise results, you should calibrate your meter regularly, especially if you work in environments with significant temperature variation. Keeping the meter within its recommended temperature range helps maintain measurement consistency and accuracy, preventing misleading parasitic draw readings.
Can Clamp Meters Detect Intermittent Parasitic Draws Accurately?
Think of your clamp meter as a detective catching fleeting clues. It can detect intermittent parasitic draws if you monitor over time or use a min/max hold feature. Watch for signals that resemble battery corrosion or subtle changes in wiring harnesses. While some transient draws might slip by, careful, repeated measurements increase your chances of catching those elusive, intermittent parasitic draws, keeping your vehicle’s battery healthy.
Conclusion
Now that you’ve learned these DC clamp meter tricks, measuring parasitic draws becomes simple and quick. It’s like having a secret weapon in your toolbox—powerful yet unobtrusive. Instead of disconnecting wires and risking errors, you get instant insights with minimal hassle. So, embrace these techniques, and turn what once seemed complex into a straightforward task. After all, mastering these tricks puts you in control, making electrical diagnostics both efficient and effortless.