
When converting your golf cart to lithium batteries, follow a strict safety checklist to avoid costly mistakes. Always inspect batteries for damage, wear personal protective gear, and make sure proper wiring and secure mounting. Double-check that your charger is compatible and connections are clean and tight. Regularly maintain your batteries and monitor for signs of trouble. Keeping safety first prevents overheating, fires, or costly repairs—stay vigilant, and if you keep going, you’ll uncover essential tips to ensure a smooth and safe conversion.
Key Takeaways
- Inspect batteries for damage, swelling, or corrosion before installation to prevent fire hazards.
- Disconnect power and double-check wiring connections following manufacturer diagrams for safe setup.
- Use proper gauge wiring and label all connections to ensure correct installation and troubleshooting.
- Secure batteries firmly with appropriate mounts to prevent shifting and potential damage.
- Verify charger compatibility with lithium batteries and conduct routine maintenance checks for safety and longevity.

Are you considering upgrading your golf cart? If so, switching to lithium batteries can be a game-changer, offering longer life, faster charging, and reduced weight. But before diving into a lithium conversion, it’s essential to understand the importance of battery safety and proper installation tips. Neglecting these can lead to costly mistakes—potentially costing you over $1,000 in repairs or replacements.
First, prioritize battery safety. Lithium batteries are powerful but require careful handling. Always follow the manufacturer’s guidelines and never compromise on quality. Make sure you’re working in a well-ventilated area, as improper handling can lead to overheating or even fires. Use appropriate personal protective equipment, such as gloves and eye protection, when handling lithium cells. Properly inspecting your batteries before installation is vital—look for any signs of damage, swelling, or corrosion. Installing damaged batteries might seem tempting to save time or money, but it’s a risk that could lead to short circuits or fire hazards down the line. Additionally, understanding the battery chemistry helps in recognizing potential safety concerns and maintenance needs.
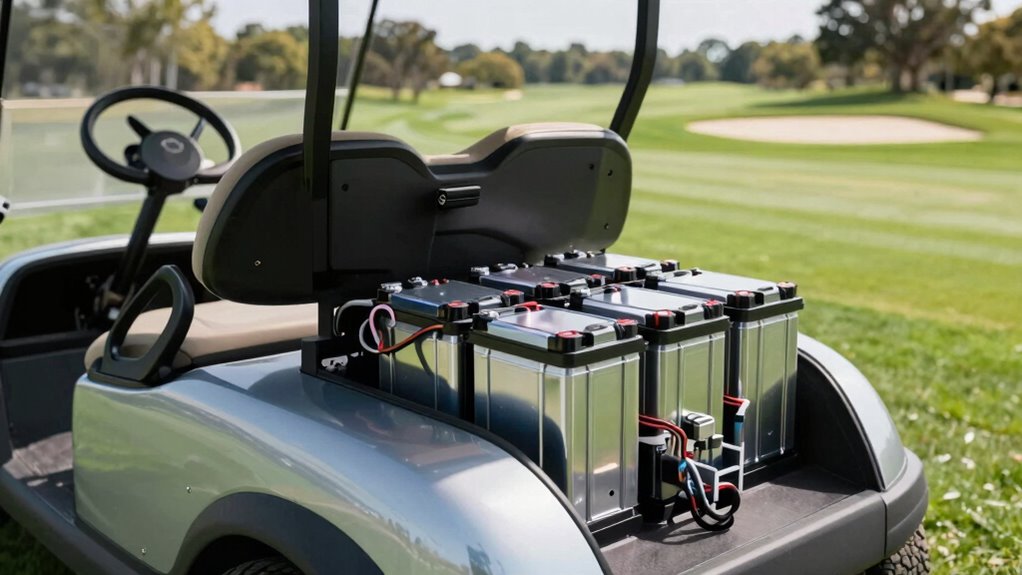
When it comes to installation tips, preparation is key. Before replacing your old batteries, disconnect the cart’s power source and double-check that all connections are secure and clean. Follow the wiring diagram meticulously—incorrect wiring can cause malfunction or damage to your new lithium pack. Use the correct gauge of wiring to handle the current load, and ensure all connections are tight and insulated to prevent short circuits. Labeling your wires during installation can save you headaches later, especially if you need to troubleshoot. Properly securing the batteries in their compartment is equally important—use appropriate brackets or mounts to prevent shifting during operation. Overlooking this can lead to damage or disconnection, which might cause sudden power loss or electrical issues.
Additionally, consider the charging system compatibility. Many lithium batteries require specific chargers, so verify that your charger is compatible or upgrade to one designed for lithium chemistries. This step not only prolongs battery life but also guarantees safety during charging cycles. Regular maintenance checks are essential once installed—inspect connections, look for signs of wear, and keep the batteries clean and dry. Adopting these practices helps avoid potential hazards, such as overheating or premature battery failure, which can be costly to repair.
In short, a successful lithium conversion hinges on understanding battery safety and following proven installation tips. Skipping these steps might seem like a shortcut but can end up costing you thousands. Take your time, do your research, and follow a detailed checklist to ensure your upgrade is safe, reliable, and worth every penny.
Frequently Asked Questions
How Long Does a Lithium Conversion Typically Take?
A lithium conversion typically takes about 4 to 8 hours, depending on your installation process and experience. You’ll need time for battery removal, wiring, and setup, ensuring a smooth installation process. With proper care, lithium batteries provide a longer battery lifespan, making it worth the effort. Rushing can cause mistakes, so allocate enough time for each step, especially if you’re new to conversions.
Are Lithium Batteries Compatible With All Golf Cart Models?
Like fitting a puzzle piece, lithium batteries aren’t compatible with all golf cart models. You need to check battery compatibility and consider your specific model’s requirements. Some carts may require adapters or modifications to work with lithium, so it’s essential to verify these details prior to conversion. Always consult your cart’s manufacturer or a professional to ensure the lithium battery you choose will fit and operate safely.
What Safety Precautions Should I Follow During Conversion?
You should prioritize battery safety by wearing protective gear like gloves and goggles during the conversion. Always handle lithium batteries with care, avoiding punctures or impacts that could cause a fire or leak. Follow handling precautions such as disconnecting the power before working on the batteries and working in a well-ventilated area. Keep batteries away from heat sources and ensure proper disposal to prevent accidents.
Can I Upgrade My Existing Battery Charger for Lithium?
You can upgrade your existing battery charger for lithium, but you need to guarantee battery compatibility and a proper charger upgrade. Verify that your current charger supports lithium batteries or choose a compatible lithium charger. Always check the voltage, amperage, and connector type. Upgrading the charger prevents overcharging, improves efficiency, and safeguards your investment. Don’t skip this step—proper compatibility and a quality charger are essential for a safe, reliable conversion.
What Is the Warranty Period for Lithium Golf Cart Batteries?
The warranty period for lithium golf cart batteries typically ranges from 3 to 8 years, depending on the manufacturer. During this time, your batteries benefit from warranty coverage that protects against defects and performance issues. Keep in mind, your battery lifespan might vary based on usage and maintenance. Always review the specific warranty details provided by the manufacturer to verify what’s covered and how to maximize your battery’s longevity.
Conclusion
Thinking about your golf cart’s lithium conversion? Follow this checklist like a trusted map, and you’ll avoid the costly detours. It’s easy to get lost in the details, but with careful planning, your upgrade will run smoothly—like a well-oiled engine. Don’t let a small mistake turn into a big bump in the road. Stick to the guide, stay focused, and enjoy a ride that’s smooth, efficient, and worry-free. Your perfect conversion is just a checklist away!